Accurizing the Ruger 10-22, Part 5

A quick recap to see how we got here:

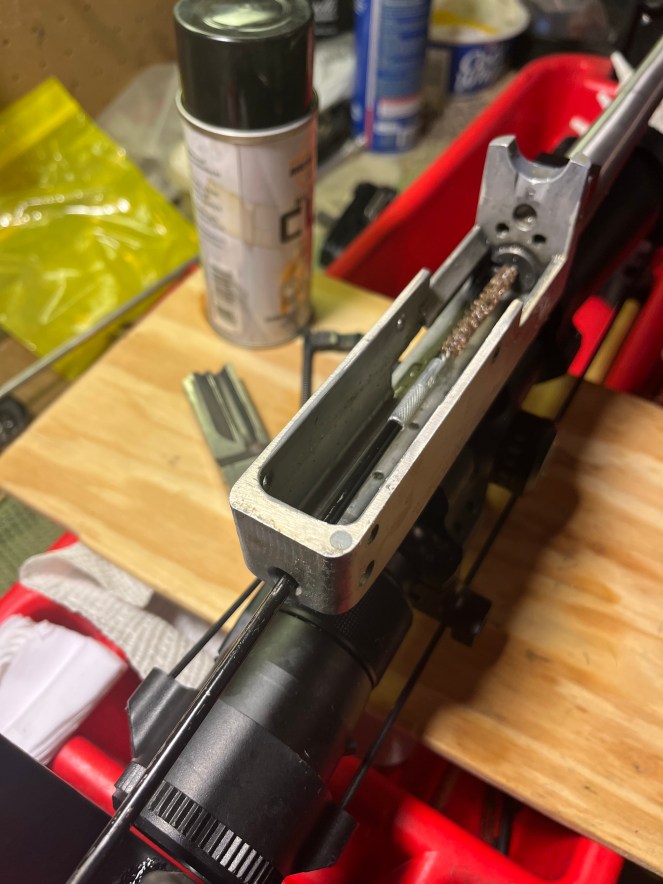
  1. Barrel free-floated.
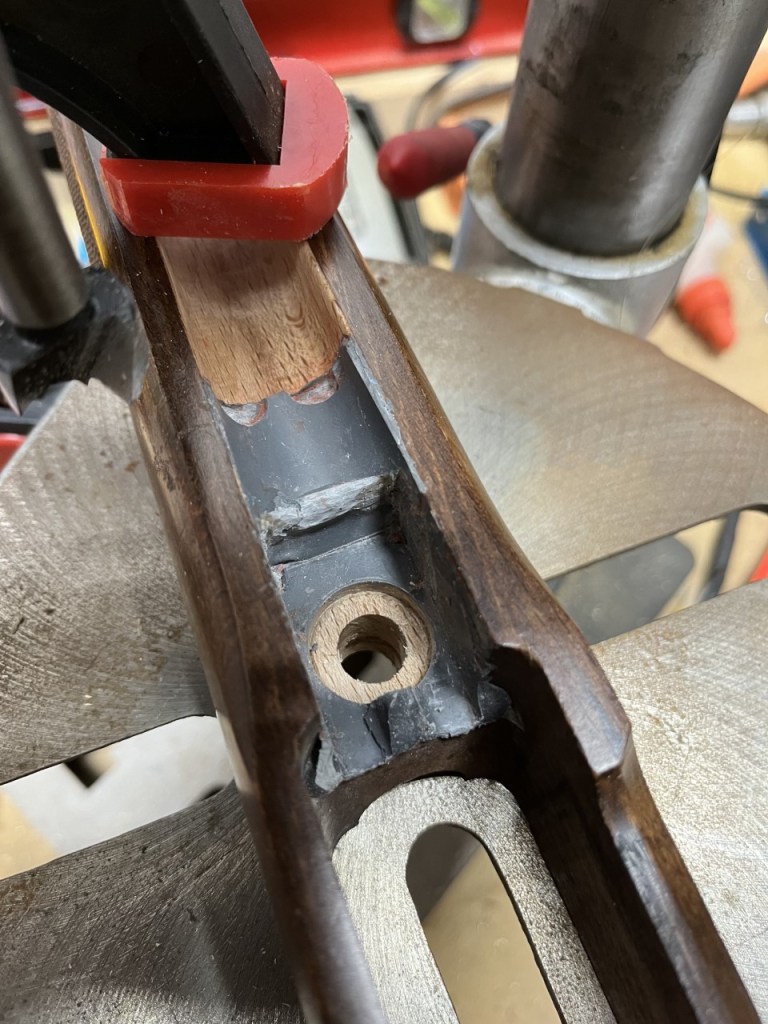
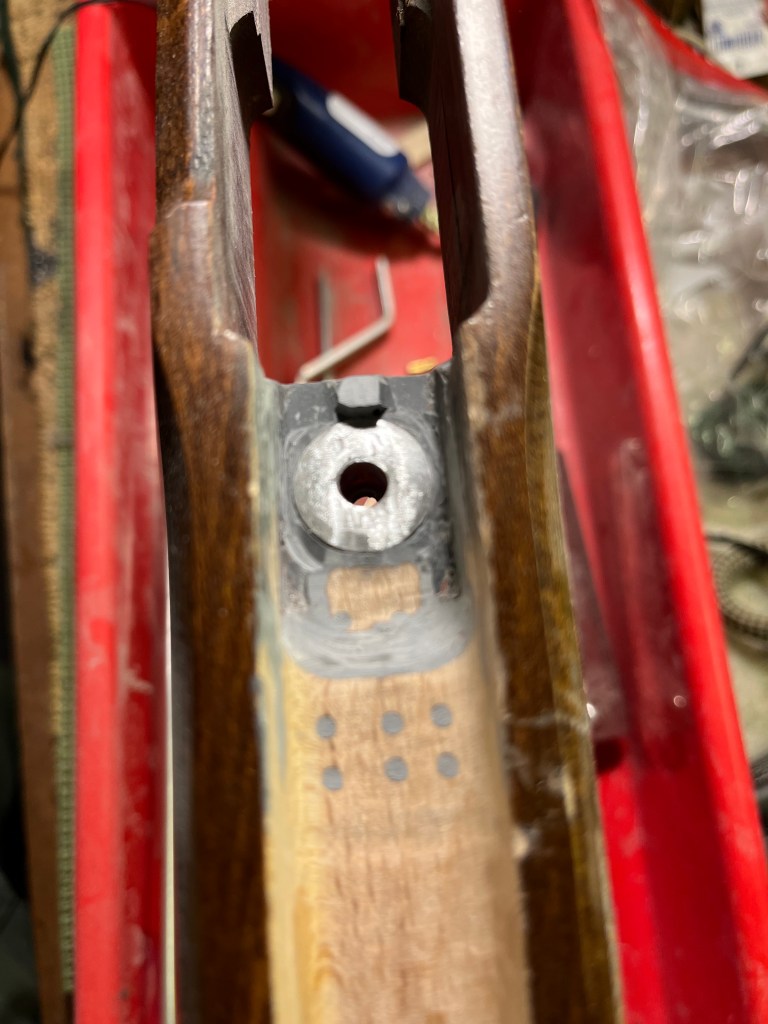
  2. Receiver bedded.
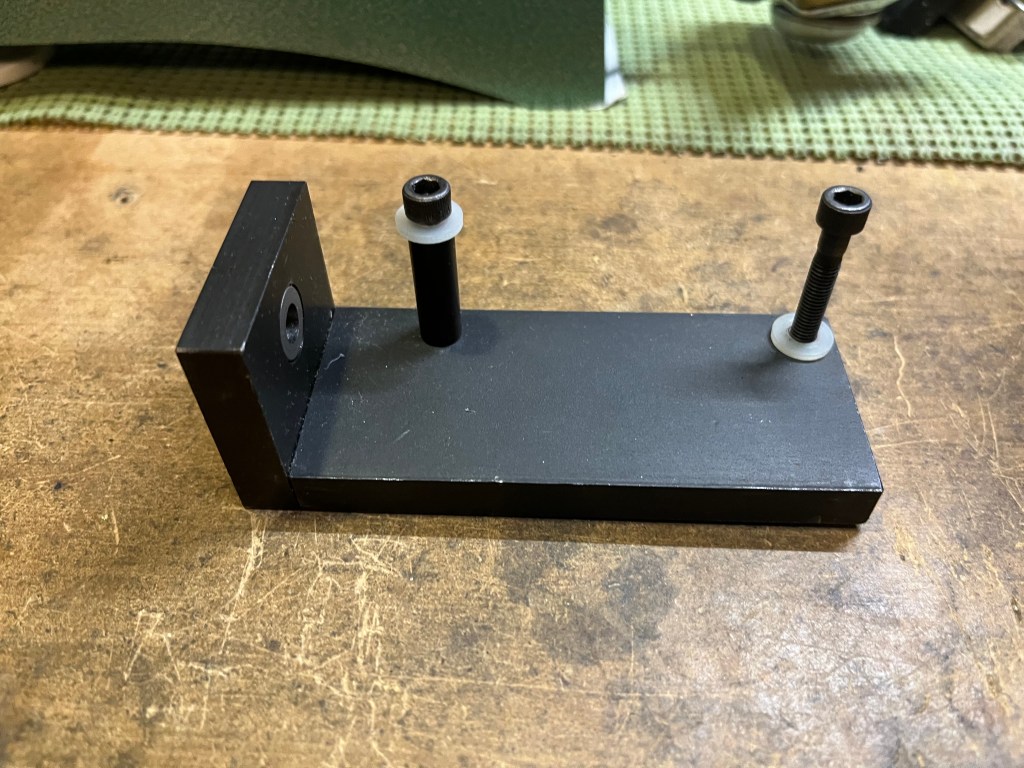
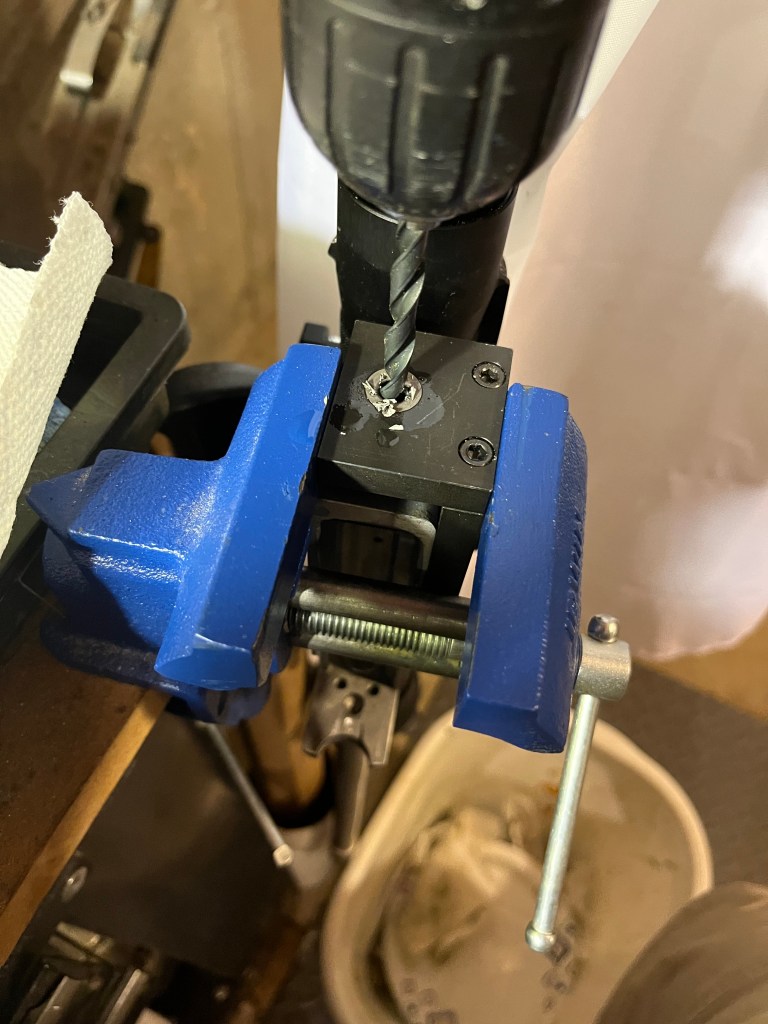
  3. Pillar and new escutcheon bedded in place.
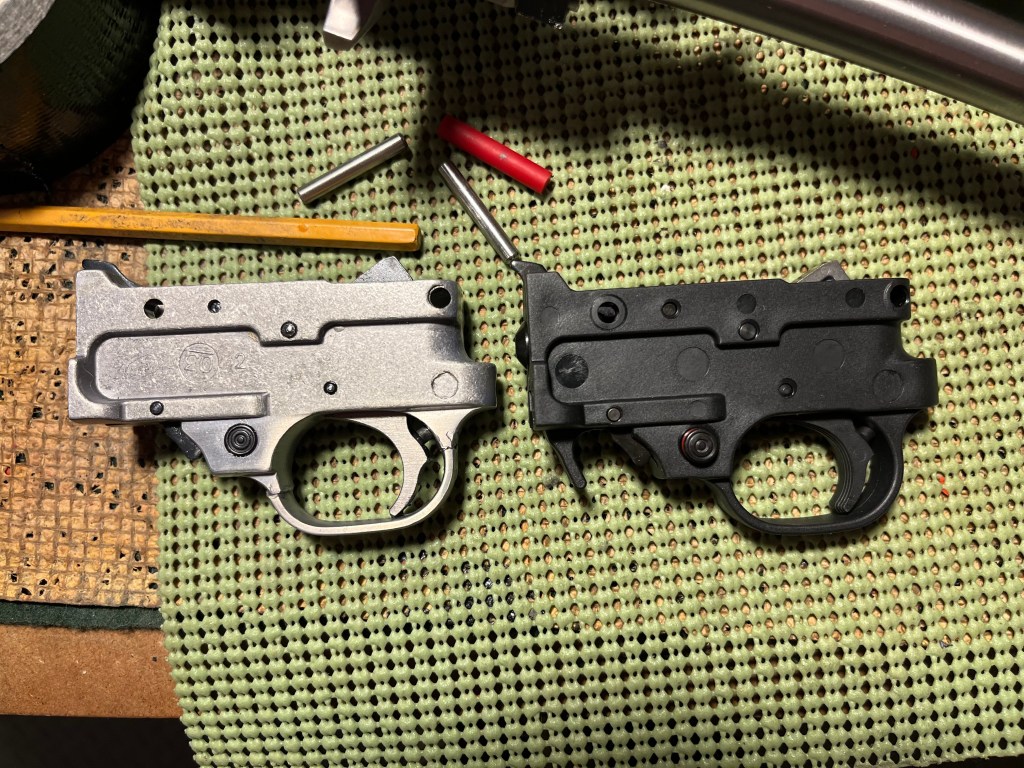
  4. New trigger group installed.
  5. New action screw to receiver torque-tested.
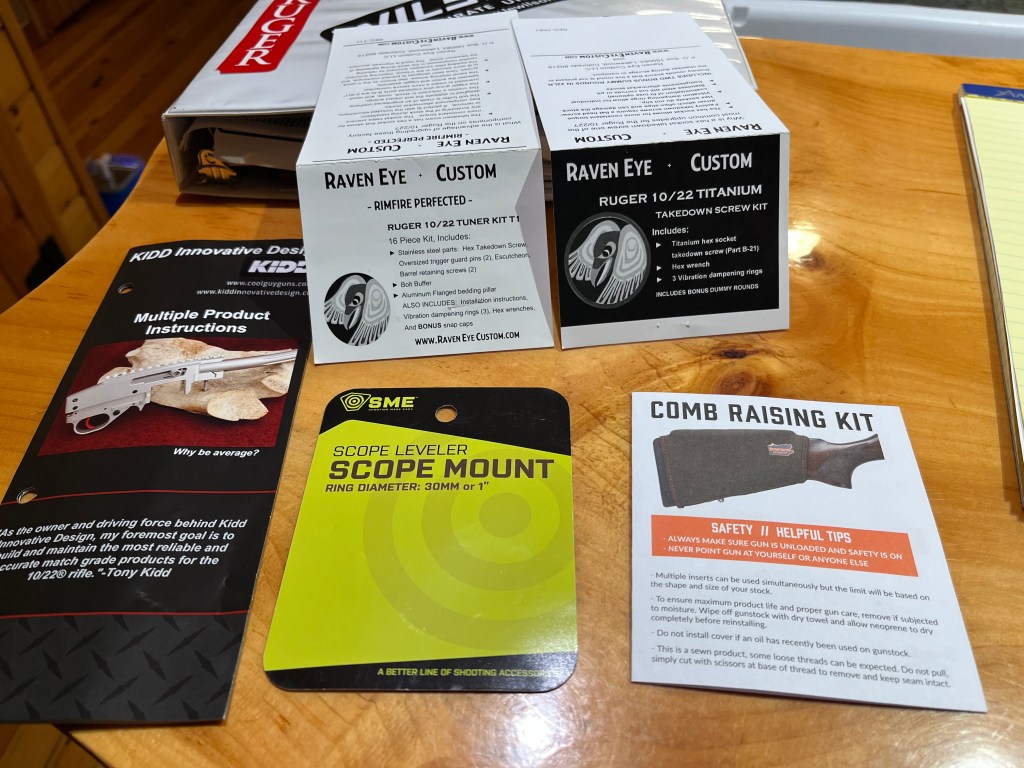
  6. Receiver tune-up parts installed.

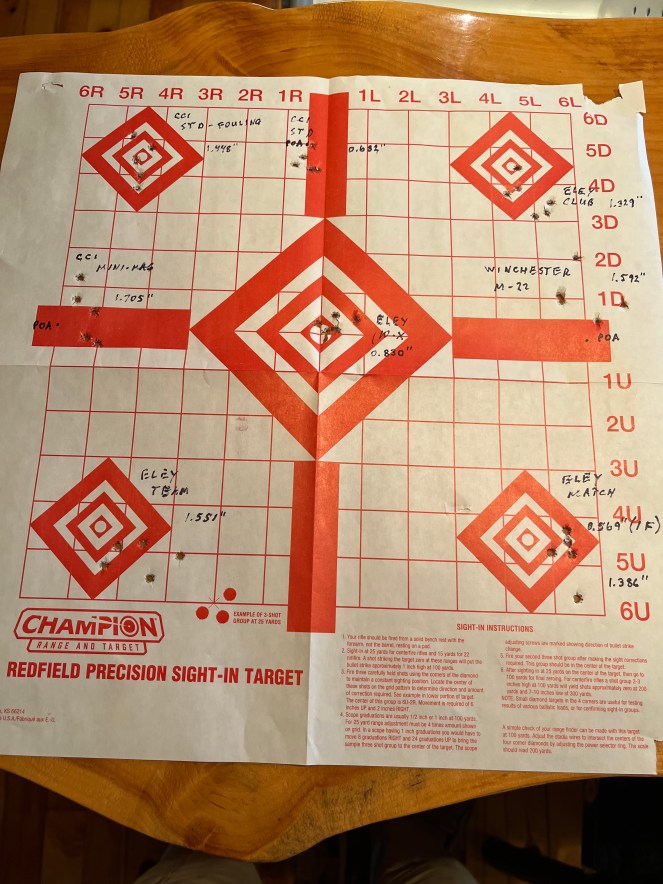
At this point I’ve put about $150.00 and many man-hours into the project. My initial conclusions were that I had increased accuracy somewhat, and that it was a fun project. But final testing after finding the proper torque on the pillar-bedded rifle showed a significant improvement – from over an inch at 50 yards to just over 1/2”. For a stock 20 year-old Walmart-purchased Ruger 10-22, I’ll take that.

However.

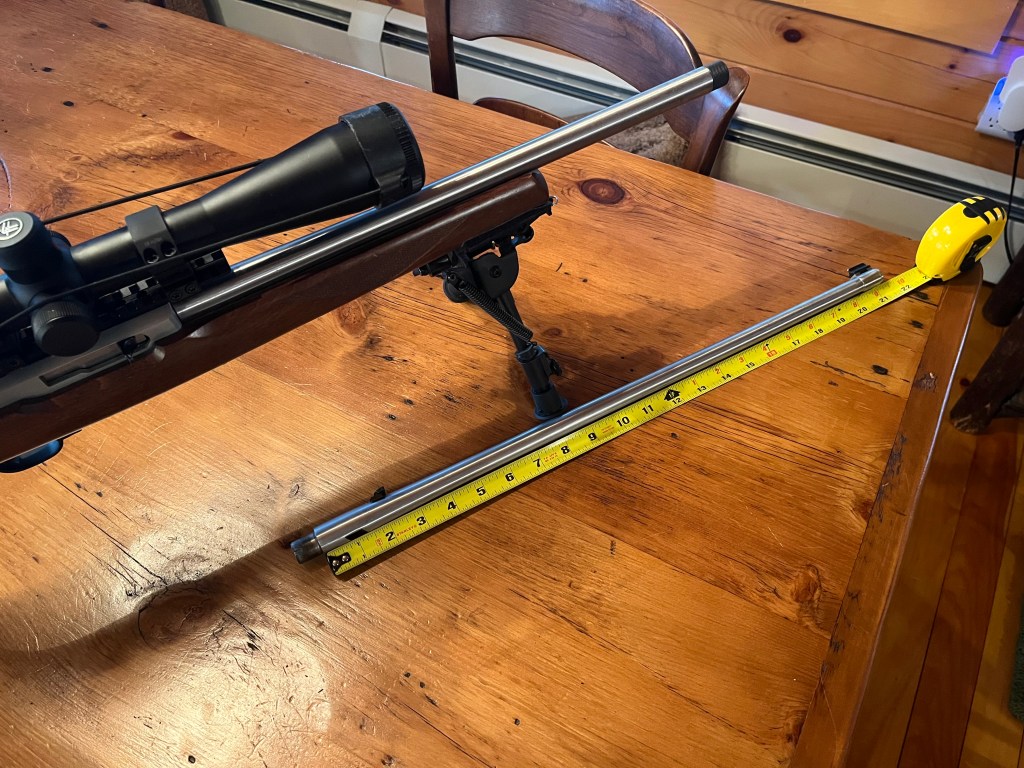
Before I had figured out the absolute criticality of torque on the action screw, I was getting such inconsistent results that I thought that I’d just order a new barrel. I also wanted to shoot suppressed; therefore it needed to be threaded. Off to Green Mountain.

Now, the original barrel is stainless, 21”. There is constant discussion about the perfect .22 barrel length – 16, 18, 22”? My Aspirin Shoot rifles are 16” and are under 1 MOA. I decided to try the Green Mountain stainless, threaded 16.25” bull barrel.

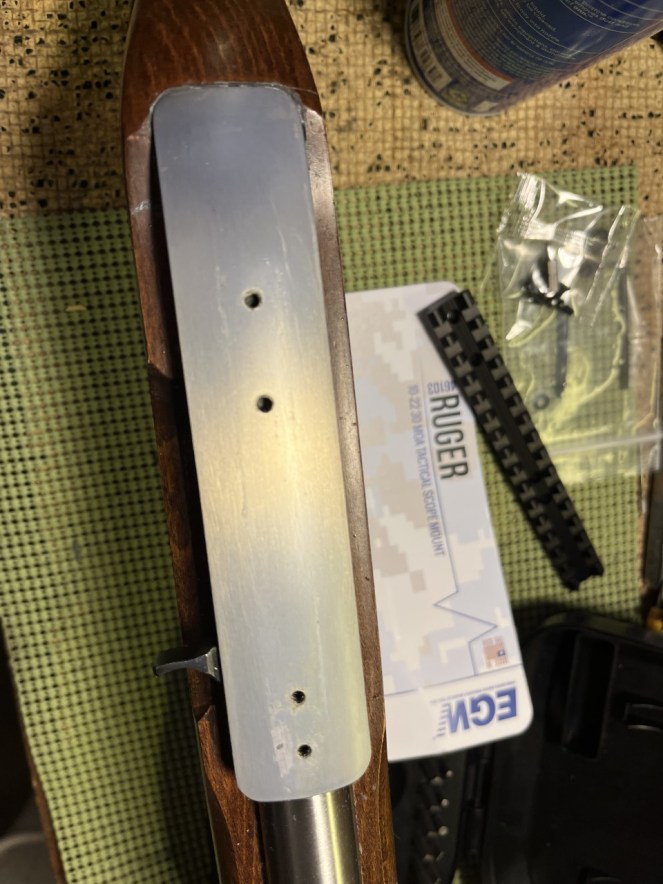
But to install it, we have to change our bedding.

Off to the range!

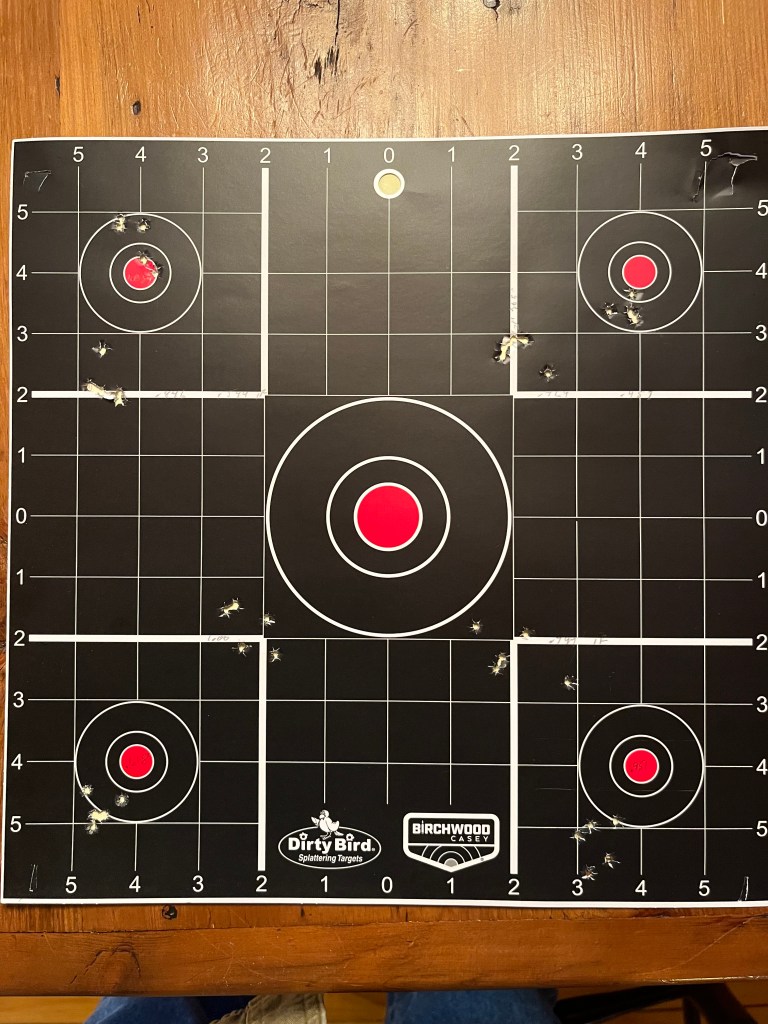
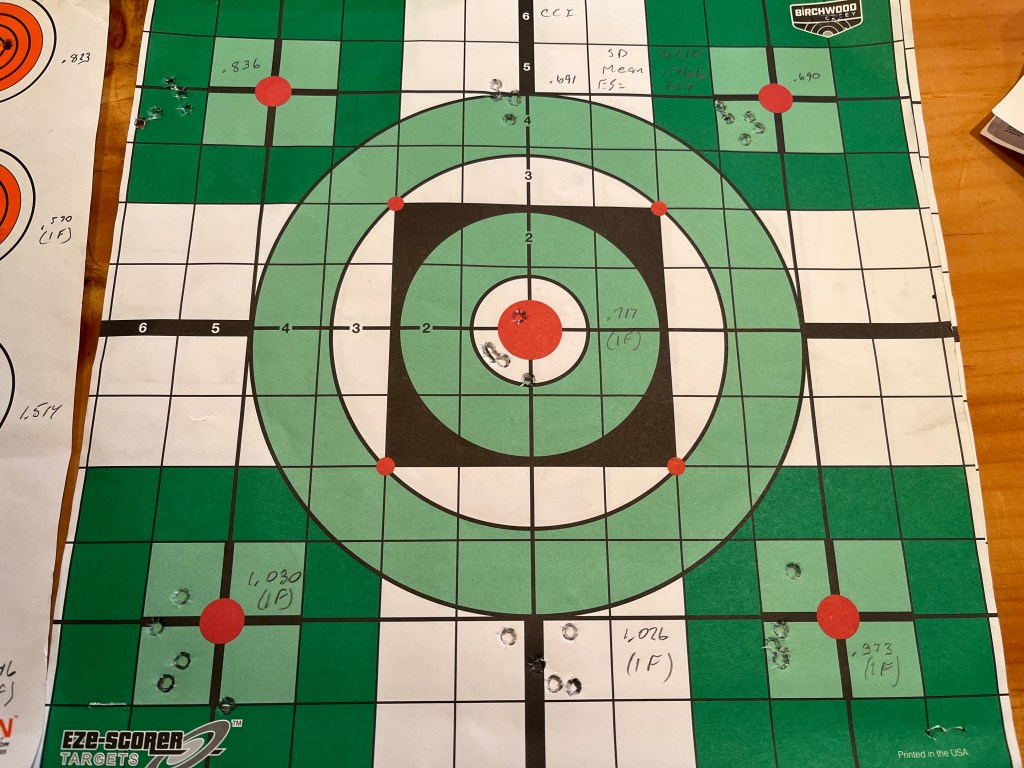
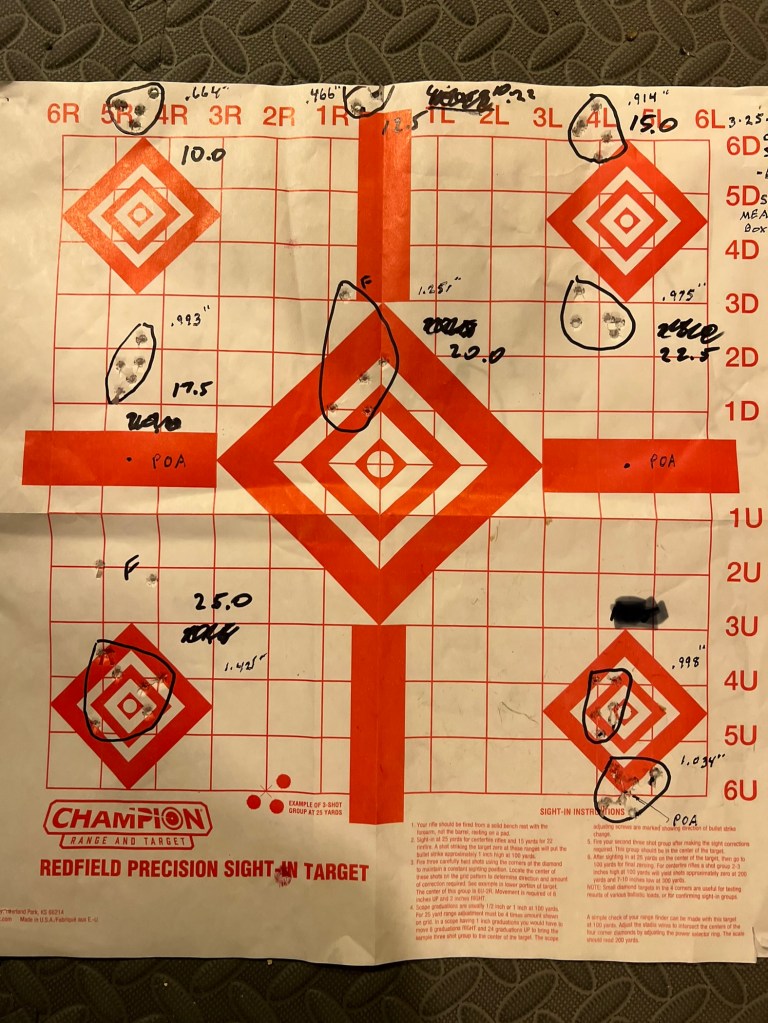
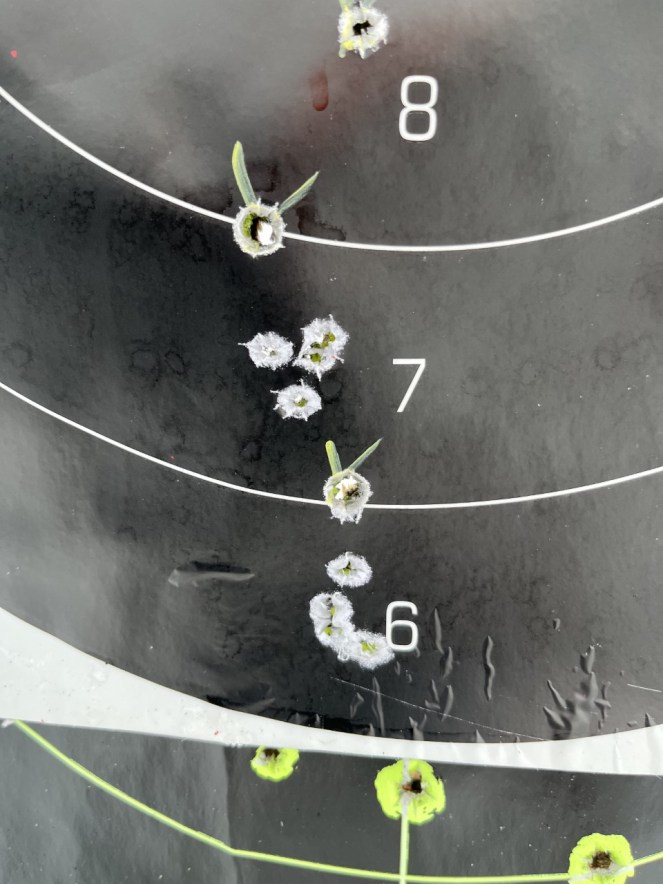
Sorry, the Dirty Bird targets don’t splash with .22. But unsuppressed we get groups of CCI Standard – .846, .544 1 F; Wolf – .457, .346 1 F; SK Rifle Match – .618, 1.00; and CCI Green Tag – .861, .744 1 F.

Suppressed is a little easier to see. We get CCI Standard at 1.126, 1.207 1 F (ouch!); Wolf – .343, .615 1F; SK – .658, .847; and CCI GT – .861, .645 1F.

Looks like my old standby, CCI Standard is out of the running, at least when suppressed? But all in all, the barrel seems to perform very well with some ammo and decently with other. My one regret is that the rifle no longer feeds Eley ammo. That stuff is superb in my Aspirin Shoot rifles. Unfortunately, it has a flat nose with a little cone in the center (patented!). The flat nose catches on the chamber edge and turtles.

And that’s the end of this story. 😇 Don’t worry. There’s more. Much more. Can you say “Aspirin Shoot”?

Accurizing the Ruger 10-22, Part 4.

This is actually more like Part 3 (b). I’m going to go over some incidental improvements that I’ve added to the rifle in the course of accurizing. First, the Ruger BX-Trigger:

Not expensive nor super top of the line, but it decreased trigger pull from 3.5 lbs to 2.5 lbs, a nice pull weight for accuracy. Also, notice the red pin. That is a neoprene-like substance that replaces the aluminum recoil stop in the back of the receiver. It is a more forgiving material that absorbs some of the recoil of the bolt flying back in the receiver. See installed below:

Next, haven’t you always been told to clean the barrel from the chamber to the muzzle and not the other way around? Starting at the muzzle can damage the crown and affect the gas pattern and bullet exit and thus, accuracy. So how do you do it on the Ruger without removing the barrel from the receiver? There is an answer in the form of a jig:

Above, reverse order because I am still a WordPress newb and/or impatient.

Other upgrades:

Did I mention that I want a new barrel? That will have to wait until Part 5.😢

Accurizing the Ruger 10-22. Part 3.

Yes, she’s shooting pretty well, but unintended consequences rears its ugly head: the pillar raises the barrel a bit more up off of the fore-end, so the scope zero has now gone much higher. I’ll need at least a 30 MOA ramp to bring it down.

Well, 30 MOA didn’t cut it. Turns out I needed much more. So I grabbed the old 20 MOA ramp and commenced to filing. Comes in at about 45-50 MOA.

Now that’s a ramp! However . . . The forward mounting screw now sticks down into the receiver and binds the bolt enough to keep it from going into battery. Hmmmm. That’s what dremels are made for.
But now I have the MOAs to shoot at 300 yards with no hold-over.

Looks like this rifle likes CCI Standards for regular chow (although I know she like some brands of match-grade ammo for dessert). More on that later.

She sprays most other kinds. Looking at past data, CCI Standard groups have gone from an average of 1.71” at 50 yards to 0.682”. That’s down 0.489”, almost a full half inch and 1 MOA! Accurizing successful, so far.

But from a low of 0.373” and a high of 1.03”, both with a flyer, I’m still not completely happy. Almost time for a Part 4.

Have you ever wondered about how to make your Ruger 10-22 more accurate? Part 2.

So how did she shoot after our first accurizing steps?
Terrible. All over the place. What gives?

As it turns out, torque on the action screw dramatically affects point of impact and group size. So, back to the range with my Wheeler Engineering FAT wrench.

10 inch pounds to 25 inch pounds, and group size from .466” to 1.421”, a huge difference, but with accuracy nodes at about 13 inch pounds and 20-23 inch pounds.
So far, so good. On to pillar bedding (which i probably should have done first).

The pillar is sort of the shape of a flattened mushroom with a hole through it.The top surface of the pillar should sit at or slightly above the wood where the receiver normally rests, and the bottom goes through the stock to a new escutcheon. The pillar and escutcheon are glassed in place to become a permanent part of the stock. The new action screw now pulls the receiver down flush to the pillar – metal to metal so no compression of the wood in the stock.

First, scary cutting with drill press, levels, etc. Then Forstner drill bit cut. It fits! Glass in place.

About 1/2” 5-shot groups at the nos. 7 and 6 with CCI Standard.

Yes, I’ll take it. But there’s more in Part3!