.22 Caliber Math

Yes, we do math here. Emily is taking you back to old-fashioned book learning. With a very practical application.

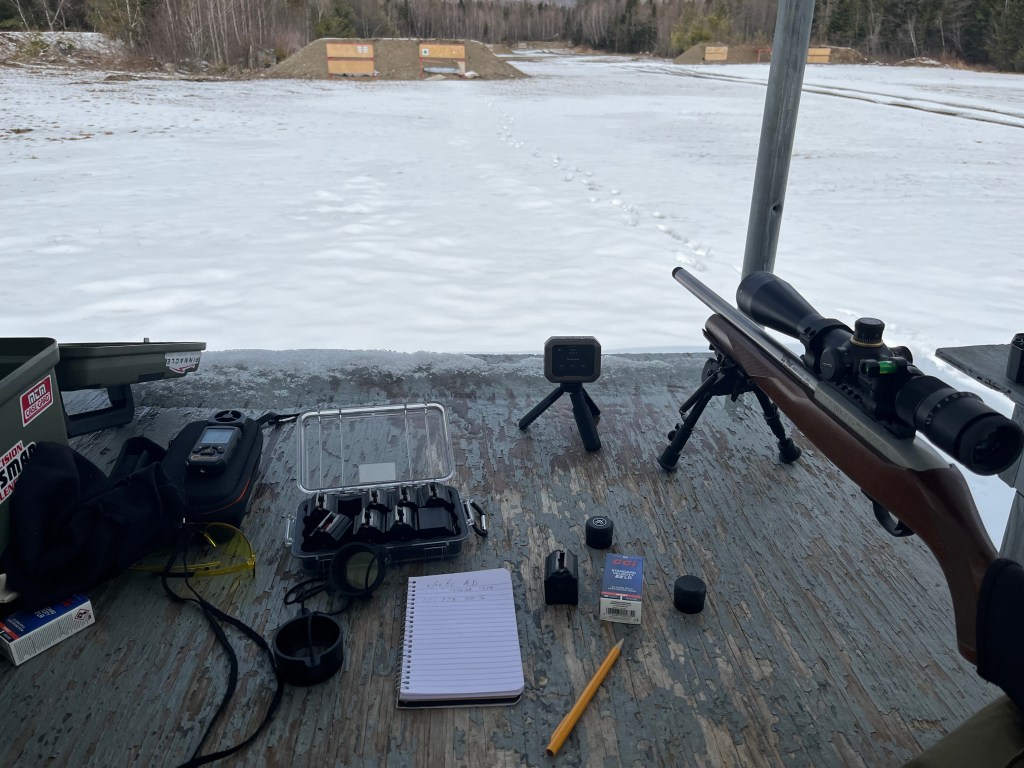
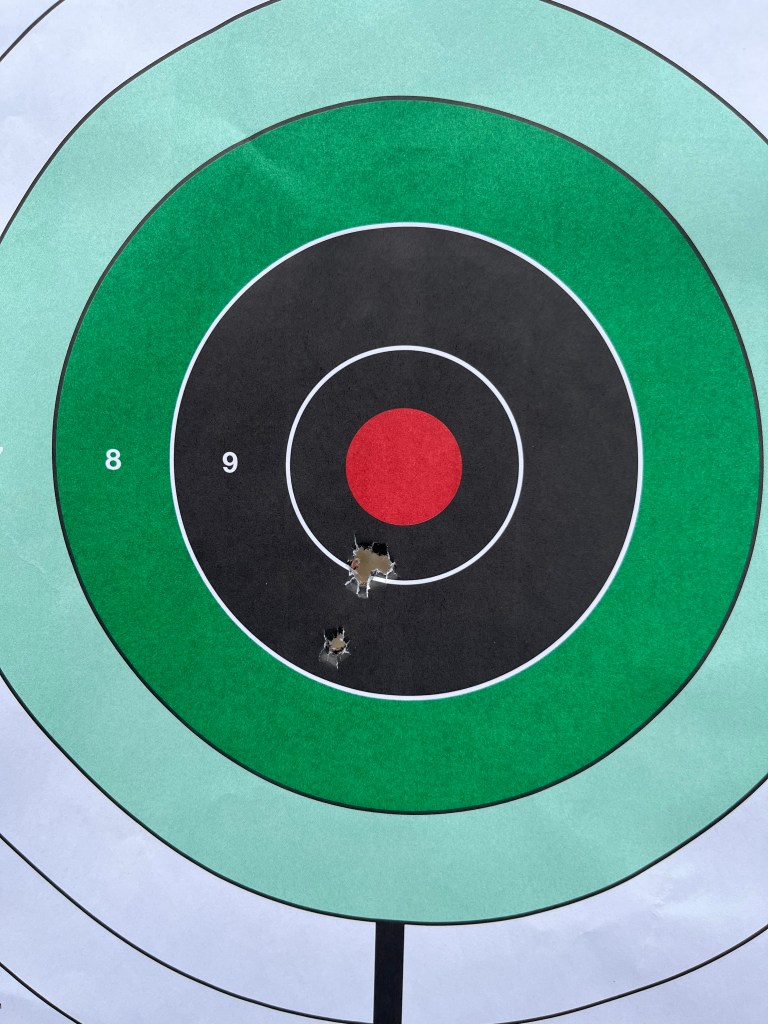
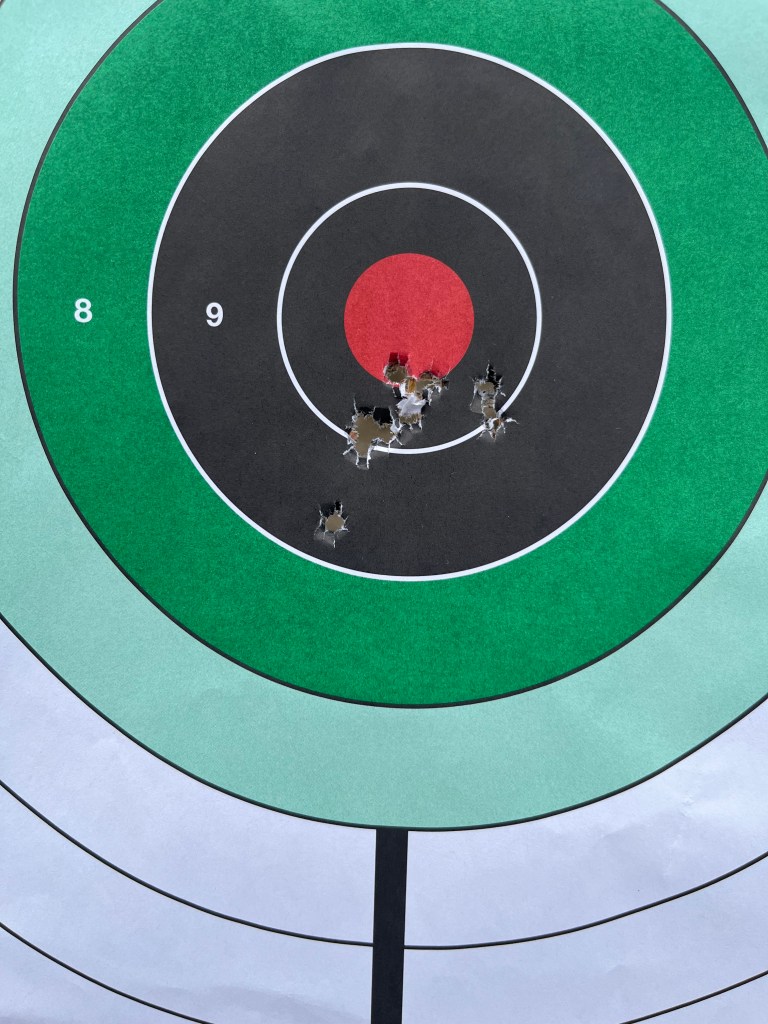
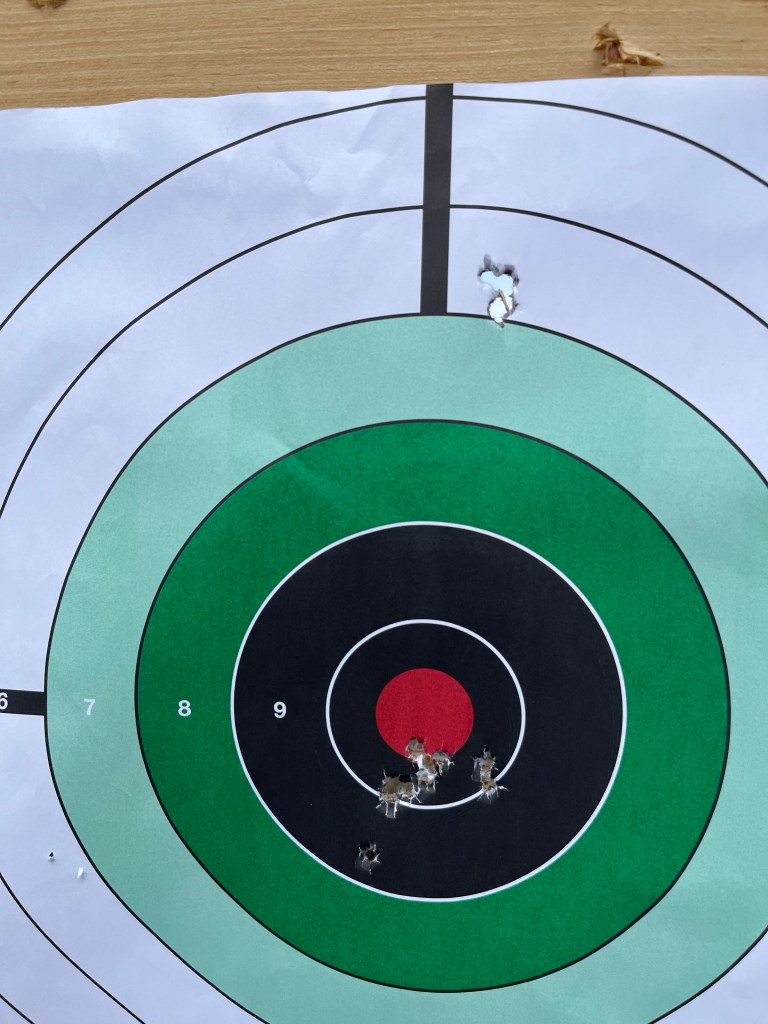
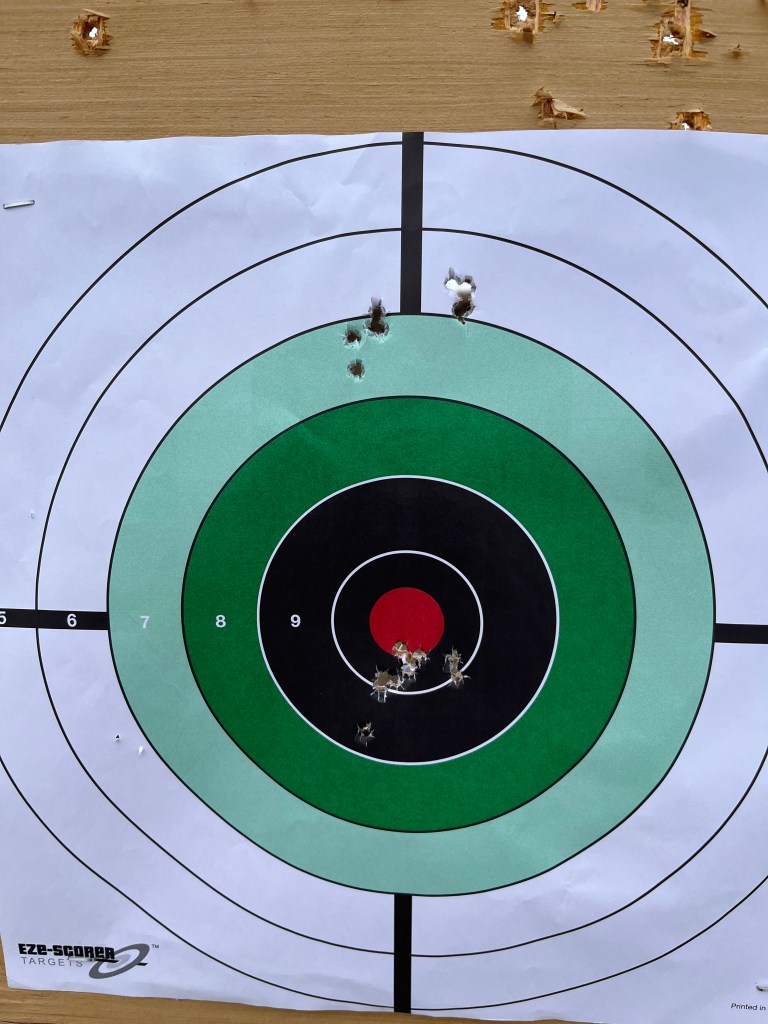
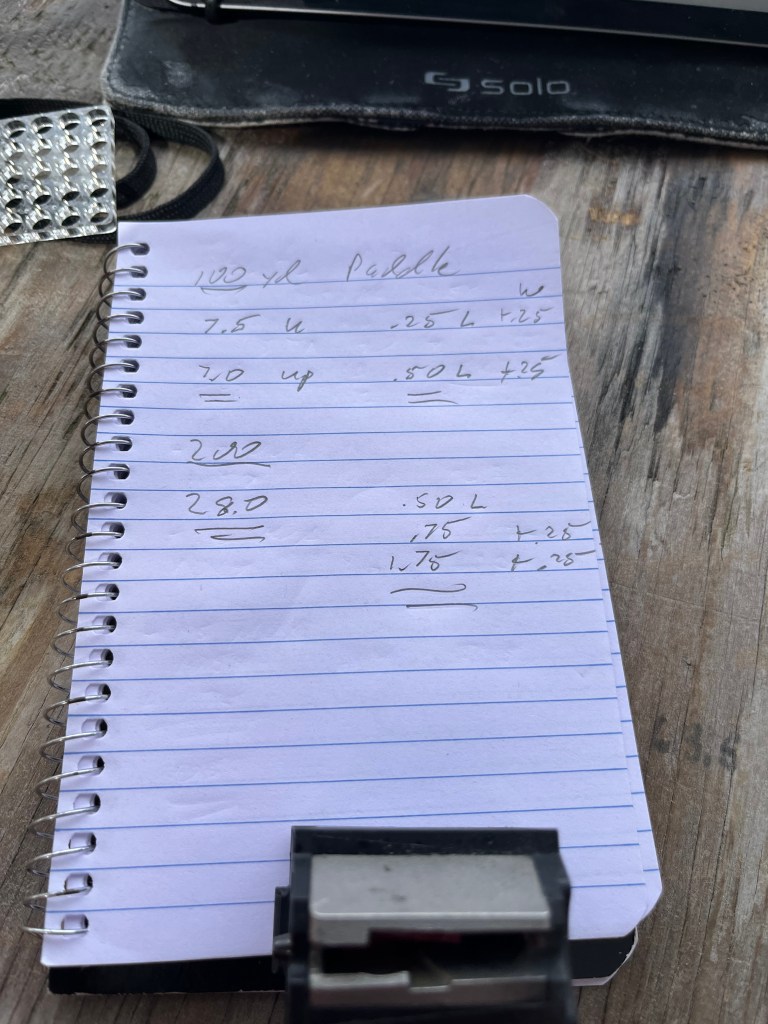
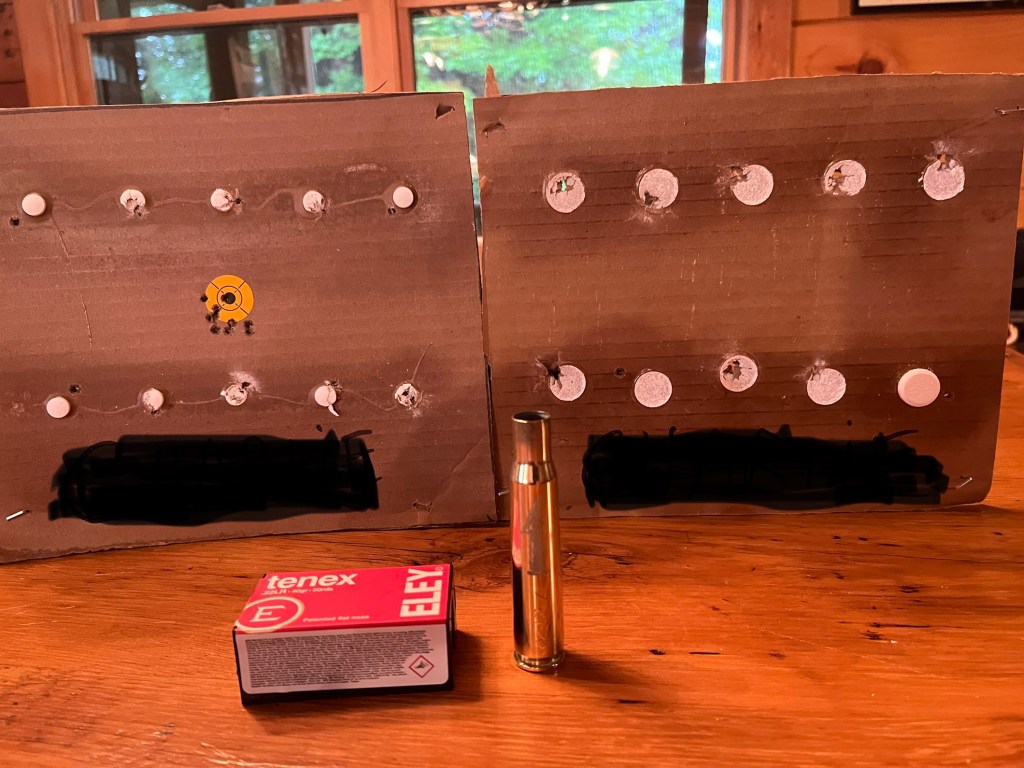
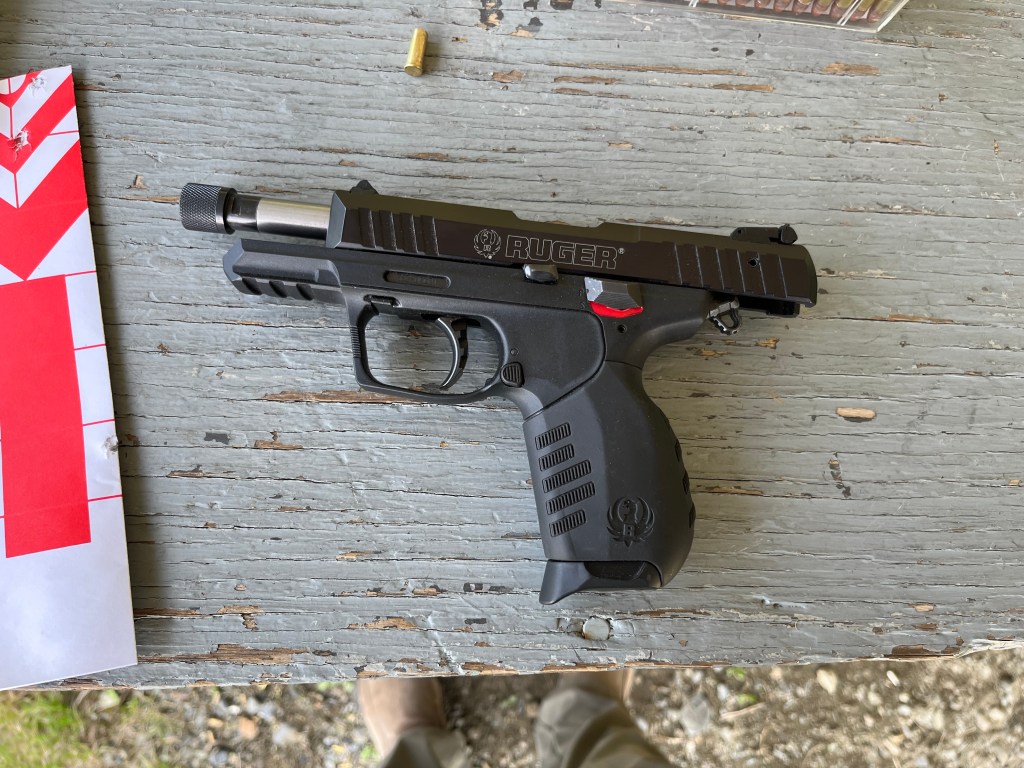
We’ve recently shown that, yes, you can accurately shoot a .22 Long Rifle bullet and hit a 5” target 300 yards away. It does take practice, but so do all good-to-have skills.
So what? Well, can that round be lethal at that range? It might be nice to know if there was a tasty rabbit or a less tasty squirrel or other source of protein out there. And you just couldn’t get any closer. Or if a farmer asked you to clean out ground hogs, woodchucks, whatever from his plowed fields. But does the .22 have the kinetic energy sufficient do to so?

Now, math. Kinetic Energy is one of several ways to measure bullet effectiveness. Let’s make some comparisons using our KE = 1/2 x Mass x Velocity Squared. For a .50 BMG (like from a Ma Deuce machine gun), plug in bullet weight of, yes, 660 grains and a muzzle velocity of 2900 feet per second. Kinetic energy comes out to an amazing 12,324 foot pounds. That’s lethal to light armored vehicles at a mile.
How about an M4/AR15 round? Plug in 62 grains and 3,025 fps and you get 1,260 foot pounds, generally accepted as lethal to humans at 500 yards.
How about a 1911 shooting a 230 grain bullet at 850 fps? 369 foot pounds. Clearly lethal at pistol engagement range.

But how about a tiny little 40 grain .22 round traveling at 1,260 fps? A paltry 141 foot pounds. And that’s at the muzzle.
“But, Mr. Red”, you say, “.22s have killed a bunch of people!” Yep. It’s called ubiquity. It’s not magic; there are just a metric sh*t ton of .22s.
The .22 is not generally accepted as a self-defense round, but shear numbers give that result. So there’s something more going on than just energy.

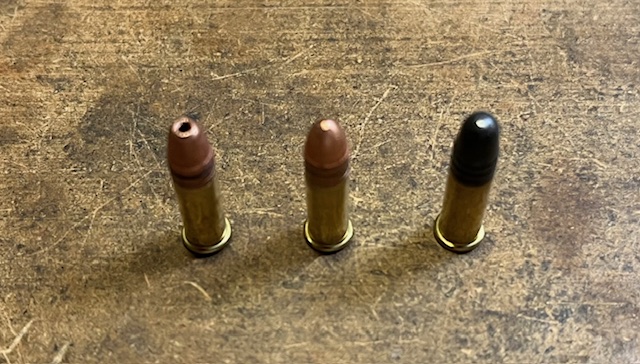
Tomorrow let’s talk about bullet design, wound channels, cross-sections and bullet placement. But still keep in mind our long range .22 shots.

Mo Ballistics

After our successful .22 zeroing and ballistics table confirmation, there is more to talk about. Remember that all that work is good specifically for one rifle with one ammo type at one particular Density Altitude. Nevertheless, that is extremely useful information. With that rifle and ammo you can shoot anywhere in the world with that Density Altitude.

But it is also useful to compare against other ammo you have tested. Looking back at my Aspirin Shoot matches last year, some ammo acts very similarly. Yesterday’s CCI Standard was 7 MOA at 100 yards. At a range of DAs, Wolf and SK were also 7, while Eley Match was always 5.5 to 6. At 200 our CCI was 28, with Wolf and SK at 26 and Eley 23.5 to to 25. Although we didn’t shoot 150 with the CCI, all the other ammo came in at 15 to 16.
Useful information to know if your ballistic app crashes or you are shooting without it.

There’s another fascinating thing about many ballistic calculators. Yesterday our real life shots were very close to what was predicted. What happens if that is not the case? You can plug in your results and the calculator can adjust its trajectory formula to match. That will also predict other distances for which you have no actual information. You now have a custom ballistics table!

Other ballistics trivia: your program is going to ask you some very important questions – distance between center of the barrel and center of the scope. This is scope height and is fed in as an offset, and can be thought of as shooting a piece of paper that is covering the end of the muzzle. Your 1.5” scope height will make the bullet hole 1.5” lower than what the crosshairs see.

You’ll also be asked about bullet shape models. G1 uses a standard bullet shape like a .45 ACP bullet. That’s great for pistols or rifles shooting pistol calibers, but is nowhere near accurate for modern spitzer type bullets. G7 is the shape you want to use. Or, if you’re lucky, the ballistics program has your bullet in its library with an exact shape.

You will also need to know the rifling of your barrel. For virtually all .22s, it is 1:16 – the bullet does one complete revolution in every 16” of barrel length.

Finally, and I can’t stress this enough – you must invest in a chronograph. The prices have come way down on these. Without knowing the exact muzzle velocity of your round, you are putting garbage into the formula – GIGO – Garbage In, Garbage Out. I have seen many shooters look at the manufacturer’s advertised MV on the side of the ammo box. I can guarantee that is not the speed of the round in your rifle. You are just wasting time and ammo if you don’t use accurate info.

So, now, get a ballistics program! Most ammo manufacturers have free ones on line that will work very well. Take the time to program it before going to the range. Now, paper and pencil go in the range bag. You should have wind device that also gives you DA, although some ballistics programs will grab local weather info over the internet for you. Take your time, document everything, and see what happens.
GOOD LUCK!

Back to work Ballistics

OK, OK! Let’s talk about how to set up and use a ballistics table. Today we are going to stretch out our .22 round. The platform will be a Ruger 10-22. Now, this is not a bog standard .22, but it started out that way: a Walmart stock 10-22 with a stainless steel barrel. It shot adequately and was a lot of fun. Until I took up precision shooting. So now it has a stainless threaded Green Mountain barrel, a new trigger group from Ruger, receiver pin and recoil pin upgrades, the back of the receiver has a drilled and tapped cleaning rod hole, the receiver is bedded and the barrel free-floated, and it sports a 4×20 Vortex scope.

/

Today we are going to use CCI Standard 40 grain lead nose ammo. This is not match ammo, but can be pretty good, and easy on the budget.
The ballistics work-up will be as follows:

Zero rifle at 50 yards. Get it really good, not just accurate.

During all of this, we are taking down copious notes on muzzle velocity, standard deviation and extreme spread, as well as all turret adjustments. We already have noted the left to right wind and its additional effects on our windage adjustments. Of course, we already have written down the Density Altitude (you were paying attention back then, right?) and kept track of temperature and pressure.

Once are happy with the zero of the rifle, we are going to lock it in on the scope. The 1.75 MOA adjustment will be made zero, by lifting the turret (disengaging it) turning it to zero, and lowering the turret. Voila! You are now zeroed! BUT, for this ammo, rifle and density altitude ONLY.

Now, we average out the four muzzle velocities and get 1059 FPS. This is what we will enter into our ballistics program. I use Advanced Ballistics (Brian Litz’s company) AB Quantum – it has CCI Standard in its library and I’ve entered the zero distance, scope height and type, etc. All I’m going to do is enter the MV, then enter 100 yards, because we are moving from the 50 to the 100 yard position.

The program gives up 7.5 MOA and left .25 MOA. That gets dialed in to the elevation and windage targets respectively. Remember to adjust/focus your parallax knob on the side of the turret. Then, 5 shots at a dueling tree paddle at the 100.

Not bad, but we want precision. We are going to drop elevation down .5 MOA and add another .25 left.

Much better. We note that real life elevation at 100 is 7.0 MOA. Now for 200. The calculator says up 28.0 and left .5 MOA. We dial it in being VERY careful of counting the clicks. We go past the 0/12 mark to the next 0/12 mark, for 24 MOA and go 4 more to 28 (different scopes have different amount of numbers per revolution). Sight on the 200 yard paddle, adjust your parallax, and 5 more shots.

See the gray vertical stringing? Even more, see the gray ovals to the right on the support? Even more left windage needed – the rounds were impacting on the upright before sliding over to the target. But elevation is perfect. So, another 1 MOA left will move the impact 2” left (you remember why, correct?) So the second page of our notes looks like this.

On to 300 yards. Yes, you can hit targets at 300 with a .22.
The table gives us up 54 MOA, left 1 MOA. Dial it, parallax, and shoot.

Hard to see, but they were hitting top fifth of the target. Several were splashing in the dirt above the target, so I dropped .5 MOA for elevation. The first shots were impacting right, so I needed to add even more left windage. And it was satisfying hearing the tiny little “tink” as lead hit steel.
A dueling tree paddle is roughly 5” square. Yes, you can hit it 300 yards with a .22. And you have accurate ballistics for this load.

Is it that time of the month already? Have an Aspirin.

The 150 and 200 yard Know Your Limits steel targets were harder. Who knew that a heavy downpour of rain would drop tiny little .22 bullets enough to miss the smallest target? But 7, 8, 6, and 7 still adds up to 28, for the win.
The best part was I was using my backup rifle, the Ruger Precision Rimfire, and Eley Tenex ammo that I hadn’t touched in at least two years.

And, the 10 year old kid from last month was not there.

The BBB 4th of July weekend is over!

So, Boolets for Bangsticks Beginners. Let’s start with the lowly, but ubiquitous (I love that word!), .22. Take note:

Left is a CCI Mini-Mag Hollow Point, center is a Mini-Mag copper plated Round Nose, and right is a CCI standard. See the differences? The HP is meant to hit a varmint and expand (make bigger hole), the center is a target round, and the right is a slower moving target round. Check out the advertised muzzle velocities:

High accuracy .22 tends to be made of lead, and slower than 1100 fps. Why? The speed of sound is about 1100 fps. If a .22 goes faster than that, then slows down, it gets less stable in the trans-sonic range before it gets down to subsonic. If it starts out subsonic, it stays more stable. Also, the lead gets a better grip on the rifling than copper-coated, making it spin better and therefore more stable.
Pretty complex stuff for the lowly, yet ubiquitous.22, huh?

Let’s get the BBB going!

No, I’m not talking about the Big Beautiful Bill. I’m talking Back to Bangsticks for Beginners!
Our story to date has covered .22 caliber firearms, starting with the single shot, bolt action rifle, the 6-shot revolver, and the 10-shot semi-automatic pistol. We now head to the .22 caliber semi-automatic rifle in various magazine capacities.

Surely you know that I’m coming back to the Ruger 10-22. But not just yet! Believe it or not, there are other rifles available. In 1972, the first firearm I bought on my own was a used Mossberg Model 352 KC, built between 1967 and 1969 according to the inter tubes.

Originally it had a crappy 1×4 (?) scope where the crosshairs would travel toward 7 o’clock when you increased the magnification. But it was accurate, both with the scope and with the iron sights. And it had a 7 round magazine, quite a step up from my old single shot. The magazine allowed Short, Long, and Long Rifle cartridges with a moveable tab to get the feed angle right.

A Thompson Center Arms on special scope mounts that clamp on to grooves in the sides of the receiver has replaced the original chinesium.
But even better, it has a thing that goes down!

Yes, the fore-end rotated down 90 degrees to make it a truly awesome Assault Rifle (TM).

So what does this step up for beginners get us? A much more stable platform than a handgun, where you have the ability to make follow-up shots without having to lose your sight picture or your grip. Since repeatability is a key factor in accuracy, keeping the rifle in the exact same position relative to your body is critical. And now you can do it 7 times in a row!

There are a ton of semi-auto .22s out there from which to choose (the Ruger 10-22 is ubiquitous, with a huge aftermarket for accessories, making it probably the most successful .22 rifle ever made). But there are other great manufacturers and options: Box magazines, tubular magazines, rotary magazines, drum magazines, they all are available to increase your ammo capacity. Find a rifle that fits your body and your length of trigger pull. It should feel natural and comfortable – you should not have to contort yourself to get a good sight picture and a comfortable trigger finger position.

OK, I think we can go on to a new class of Bangsticks for Beginners – shotguns!

Not so fast there, bucko.

Yesterday I mentioned jumping on to semi-auto .22 rifles in our Bangsticks for Beginners discussion. Then I realized we had skipped some important things on .22 hanguns – actually shooting them! As I was remediating that condition today, I also rembered some stuff I glossed over. Spent cartridge ejection. Let’s cover that now since it has some range safety implications.

You can see the shiny ejection rod poking through the empty chamber. Once the rounds are fired, you go to half-cocked, as if loading, then push down on the spring loaded ejection rod at the front of the barrel. You need to pop out each spent round as you rotate the cylinder. Again, limited ammo and manual ejection slows down the process so beginners can grasp everything fully.

As far as the Ruger SR 22 (and all other semi-auto handguns), when the slide recoils to the rear, it first extracts the spent shell from the chamber, continues toward the rear where it is mechanically extracted and flung to the side, then cocks the trigger/hammer, moves back forward and strips a new round from the top of the magazine and seats it in the chamber. It all sounds very complex and happens fast, but is a simple complex.

Now the Range Safety Tip. Extracted Brass Is Hot! ‘mkay? As much as I appreciate women wearing low cut blouses, that’s a no-no on the range. Same same for open shoes. And an absolute necessity is eye protection (safety glasses for the slow to catch on). Finally, a brimmed hat to help deflect hot brass.

Safety nag over. Let’s shoot!

You can see a round in the cylinder, and the extractor rod tube ahead and aligned with it.

Results? OK, on paper but not very good.

Top is 5 yards, bottom is 7, two-handed grip, Weaver stance (file for future reference). I clearly was not keeping the front iron site down all the way in the rear notch, hence, shooting high. My trigger pull was poor, pushing the rounds left. Back to fundamentals, as certain people always preach. The Ruger? Also inconsistent:

Oh, we can do better than that. Sure, it’s 85 degrees, I’ve been mowing for four hours, and my socks are too tight. 7 yards, RG on the center, Ruger on the end of the right bar:

Practice, practice, practice. Maybe .22 rifles tomorrow. But, a teaser for later. See anything different?

Think hearing protection.

Let’s jump to semi-autos as our next Bangstick for Beginners.

Semi-automatic. What does that mean? A lot of politicians and leftists don’t know or pretend to not know. Simply, the firearm fires semi-automatically – one trigger pull fires one round. The slide recoils backward to recock the trigger, then forward to strip a new bullet from the magazine. That’s it. It does not continually fire as long as the trigger is pulled back. That would be “automatic “ – as in machine gun. No, AR-15s are not automatic. They are semiautomatic, requiring the trigger to be pulled for each shot. Another term for automatic is “select fire”, meaning that you have three settings you can select: Safe, Semi and Automatic. An M-16 is a select fire weapon, thus, a “machine gun”. Not generally available to the public without a lot of money, and BATFE approval/$200.00 tax stamp. And more money for ammo. The rate of fire is about 800 rounds per minute. Given that the Normal Capacity Magazine contains 30 rounds, you can empty it in less than 3 seconds. At $0.40 to $1.00 per round, you will need deep pockets. Oh, yeah. It’s a magazine, not a clip. See M-1 Garand for clips.
So, rant over. But introducing a new shooter to semi automatic firearms is a great opportunity to clear up misunderstandings (or fake news) about firearms.
Here is one of my favorite handguns:

Ruger SR22. A .22 caliber semi automatic handgun, with a 10 round magazine:

It is a Single Action/Double Action pistol, meaning you can choose to pull the trigger with a long stroke to cock the hammer and release it, thereby firing a round. At that point, it will recock and load a new round so that further shooting only requires a short pull. Or you can manually cock the hammer and go right to the single action of pulling the trigger. Easy peasy.

it also has a manual safety on both sides. But remember, the only true safety on a gun is between the ears.
Small, lightweight, easily packed, and has virtually the same manual of arms of most semi automatic pistols. Fun to shoot, and trains you with a light recoil, on most aspects of shooting. And .22 range ammo is inexpensive. Many .22s are picky about what they will feed; I have never had an FTF (failure to fire) with this gun.

Interestingly, Ruger makes a bigger 9 mm version of this – The SR 9 and a compact SR 9 C. Yes, I’m a bit of a Ruger fanboi, but they know what they are doing. Train on the SR 22 and then move up.

Tomorrow we’ll take a look at .22 caliber semi automatic rifles!

So, I went to the range today

Fully intending to shoot some .22 handguns. Of course, I left them on the inside garage steps, being distracted by putting all my range stuff back in the car following vacation – sorry, secret mission.

I’ll probably remember them tomorrow, but let’s take a look at the next step for beginners – the .22 revolver. Why, an obsolete firearm design that can only hold six rounds? Because it teaches Single Action, Double Action, Double Action Only, all concepts carried over to semi auto hand guns. It also forces slow fire, gun fundamentals, and sight alignment. It also teaches about changing grip – the gas escaping around the forcing cone will definitely hurt, so be aware.

Let’s take a look:

I bought this just south of Fort Campbell on 41 A at a local hardware/convenience store in 1975 for less than 20 bucks. It’s a German-made “RG”. RG had an abysmal reputation – some parts made of pot metal, etc. It was said that there were only two types of RGs – complete junk, or OK. I evidently got the latter. It is still reliable a half century later.

There are three hammer positions – quarter cock, safe like a 1911 cocked and locked; half cocked, for spinning the cylinder and loading; and full cock, for shooting (and where does the phrase, “Going off half-cocked” come from?).

Half-cocked, and loading gate open. I find that having new shooters have a limited amount of ammo makes them concentrate more on fundamentals. There is a time and place for semi autos, but not for a beginner.

“Safe”, so you can carry six rounds, without worrying about having the hammer riding on an empty cylinder.

Ready to go. And understanding that Single Action means manual cocking, and that the only action of the trigger is to release the hammer to fire the round.

Later, instruction on modern revolvers where Double Action means that the trigger first cocks the hammer, then releases it to fire. And then later instruction about SA/DA where you have the choice of either. Finally, Double Action Only, where the trigger pull is required to cock the hammer and release it in order to fire.

So what kind of trigger action is a 1911? Or a Glock?

Bangsticks for Beginners

Earlier I gave my two cents and preached a single shot bolt action .22 as a great BFB. After all, that’s what I started with and I turned out ok. Christmas, 1964 was the happiest day of my life (I thought at the time), when the very last present I opened was a Sears Roebuck Ted Williams .22 rifle. It shot .22 Short, Long and Long Rifle cartridges, and, boy, did I go through boxes of the stuff.
I had done a complete research project on .22s (at the school library!) to show my folks that I was serious and safe. I still have that rifle today.

You have to hand load a single round in the chamber, close the bolt, and then pull back the cocking knob.

Yes, you get pretty good at fundamentals when it’s a single shot rifle. Of course, the next year I got a little 4 power scope and was off to the races.

And, once I got into rifle accurizing, some fifty years later, I glass- bedded the receiver, free-floated the barrel, added a decent scope and a bipod.

I’ve started several people off shooting with this rifle (including Mrs. Red and Junior). It always starts with The Four Rules, a discussion of the parts of a cartridge and what they do, and then the basics of stance, sight alignment, breathing and trigger pull.

Tomorrow, we’ll take a look at the .22 revolver as a BFB.